

Maggy's Pantry Makeover
Maggy and I had so much fun transforming her pantry into a beautifully designed and organised space, one that she would be able to maintain easily for many years.
Here’s a step by step guide on how to get the pantry of your dreams, in one day and on a budget!
N.B. Pantry is not 100% complete, there are missing containers and labels we are waiting on.
When Maggy first came to me about her pantry she was concerned about all the panels and shelving she had in the cupboard. I actually got excited and re-assured her that it worked in our favour. Her large floor to ceiling cabinet pantry provided ample space to store all her kitchen essentials and the more shelving and panels, the neater it would look!
However, what was lacking in her pantry was suitable and practical storage solutions. Smart storage and efficient use of space is essential with a cupboard pantry. They make a huge difference when it comes to organising dry packet ingredients and also adds an element of style and design to the pantry. In saying that, you shouldn’t go out and purchase any container/storage baskets. Prior to starting your pantry you must have a plan! Set out your budget, measure your area and cabinetry and source all your storage solutions accordingly.
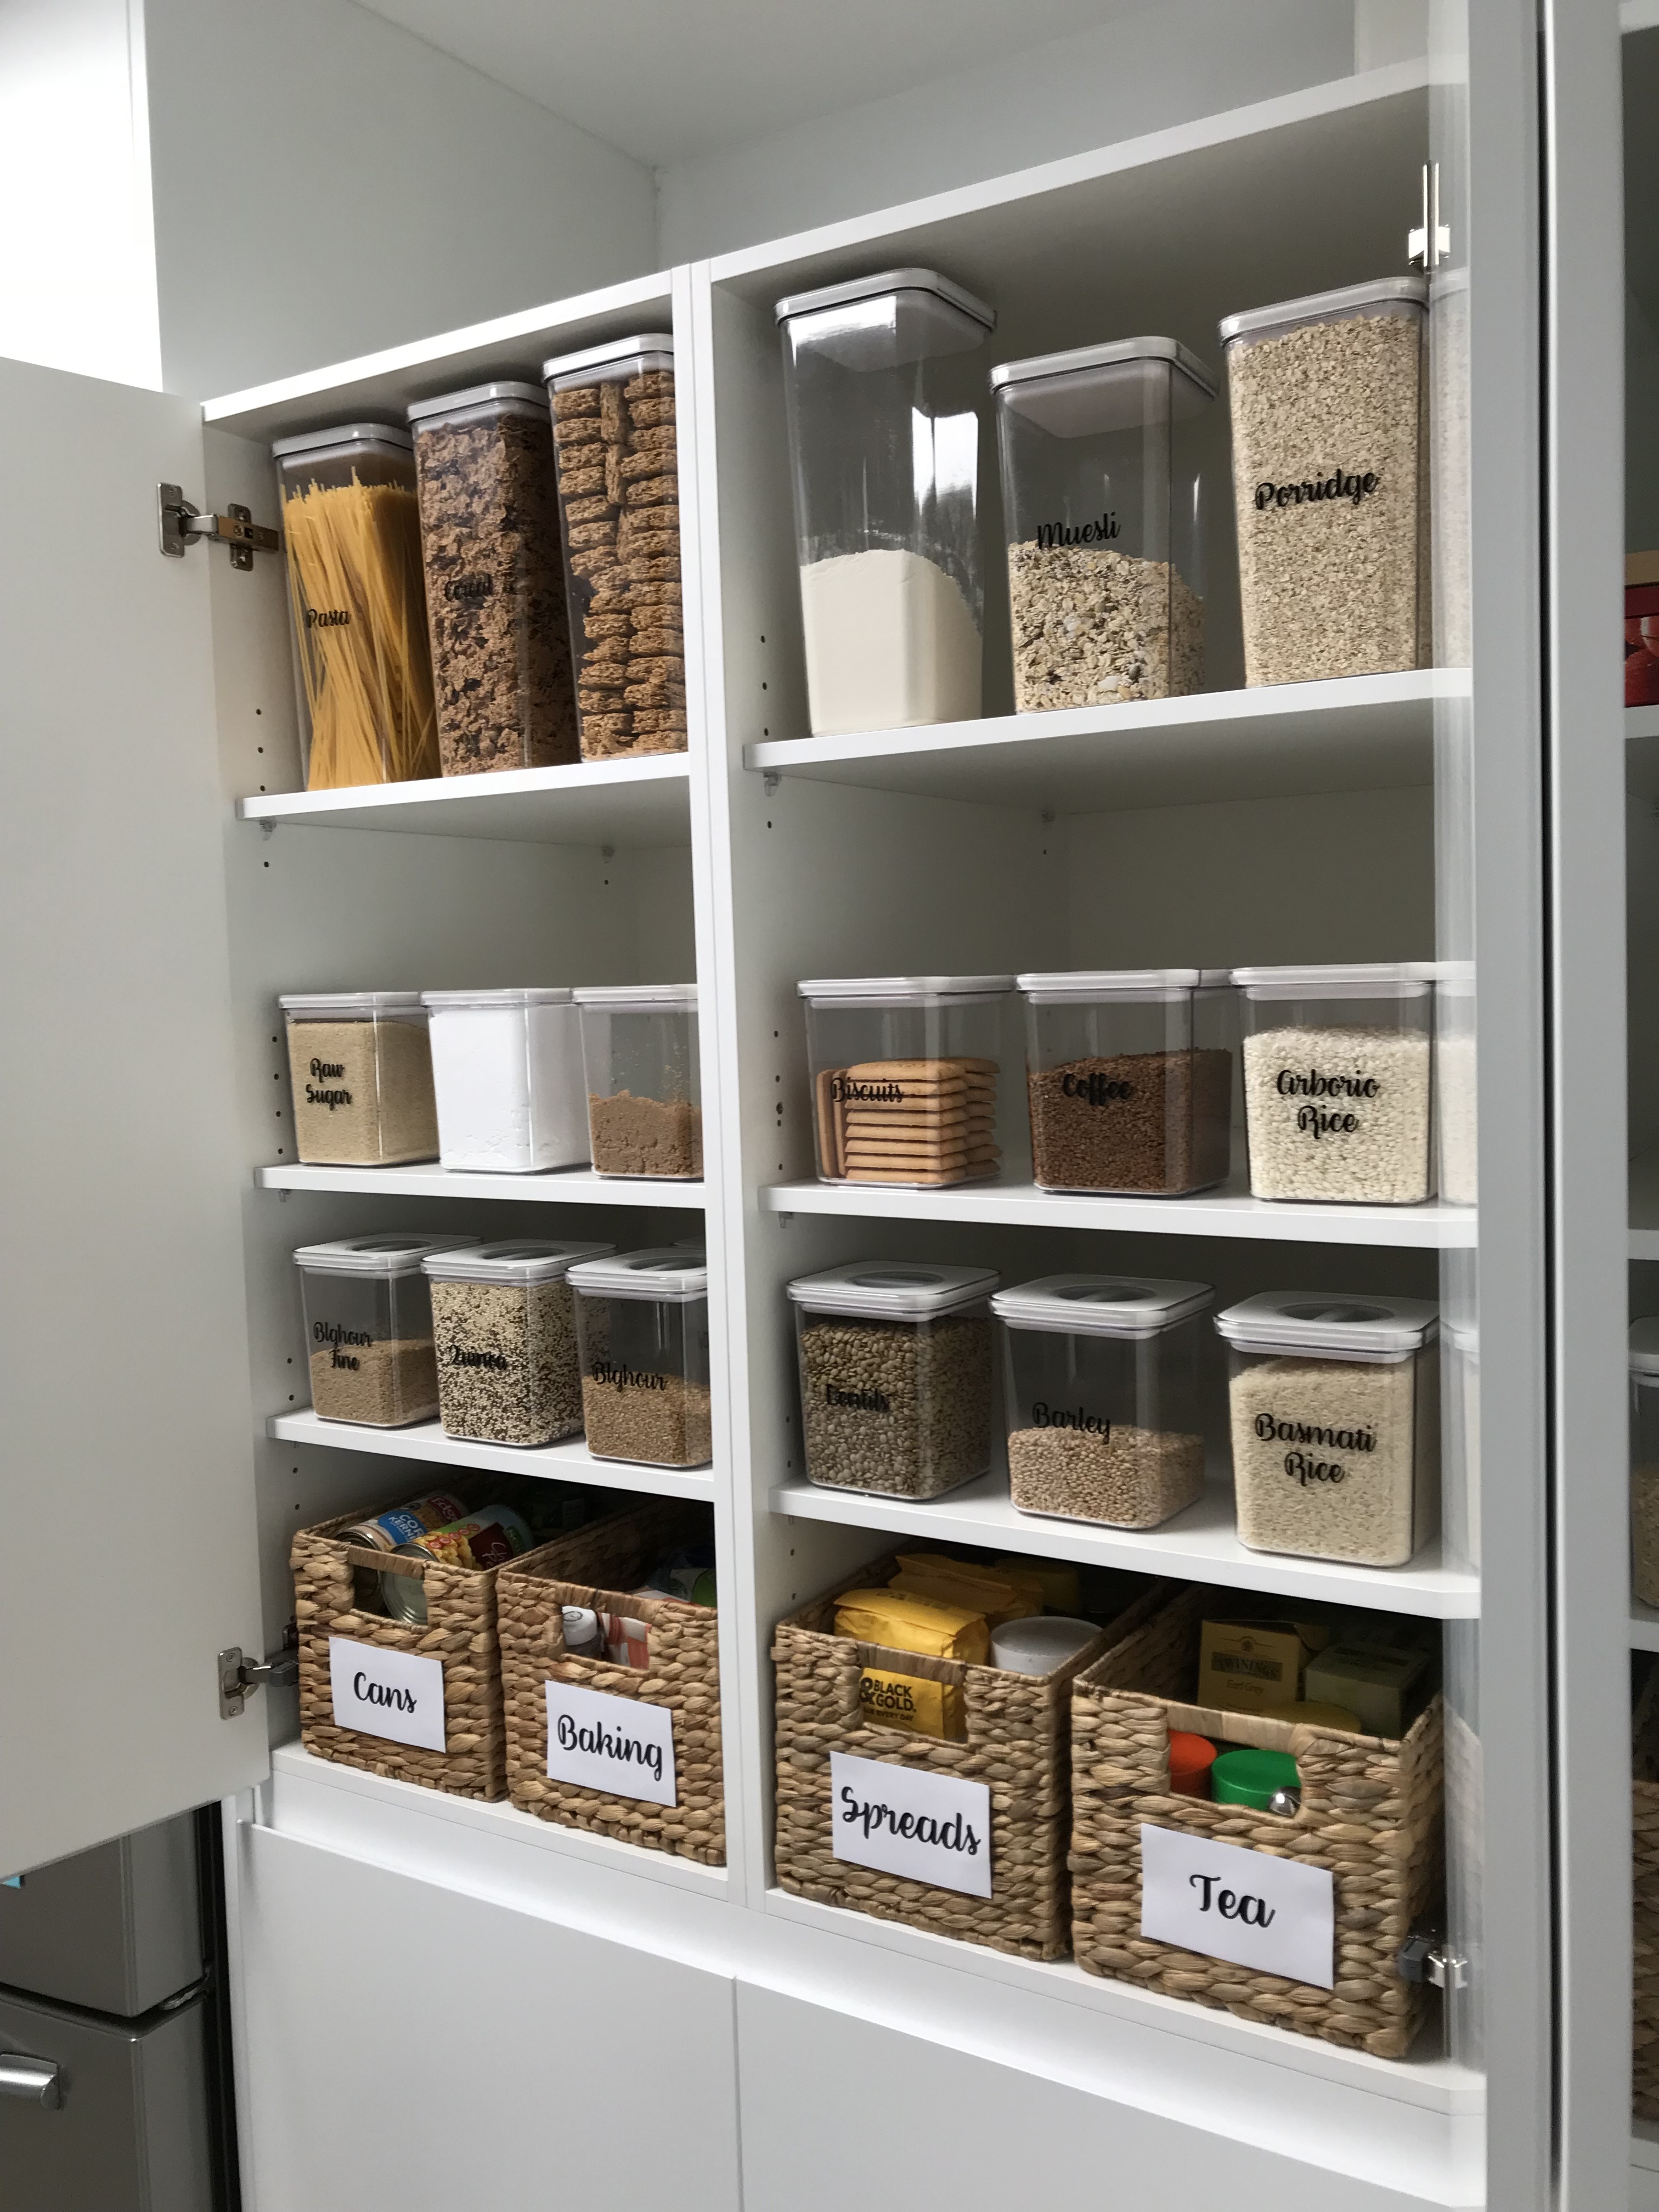
At the time Aldi were having their huge kitchen storage sale and I advised Maggy to head in and grab their fantastic canisters. Not only are they great quality, they are super affordable (pack of 5 canisters for $19.95). I haven’t been able to source the exact containers anywhere else but here are similar containers you might want to consider.
- OXO Pop Containers
- Click Clack Houseware
- Target's modular kitchen canisters (in store only)
- Kmart
- www.kitchenwarehouse.com.au (online only)
- Peter's of Kensington, Victoria's Basement and Howard's Storage World have a great range of similar canisters and if you're lucky your favourite's might even be on sale.

Prior to starting the makeover I always advise my customers to do a stocktake of their pantry and decide what they want to go in containers/storage tubs. Ingredients that you would use often or those that come in packets that cannot be re-sealed should go in containers (sugar, flour, rice, etc). The rest you can throw in your storage tubs/baskets. With that Maggy organised her list of ‘pantry labels’ and ‘storage labels’ and I had the labels ready to go when I arrived.

Next step is to really give your pantry a good clean, remove everything out of there and give it a good wipe down. Throw all those packets of food that have been sitting at the back for months. Here you will realise just how much we tend to overbuy.

Having an organised and tidy pantry, while it’s aesthetically pleasing, in the end it not only saves you time but money. Doing the groceries at the end of each week will be a breeze when you can see right infront of you what needs re-filling.
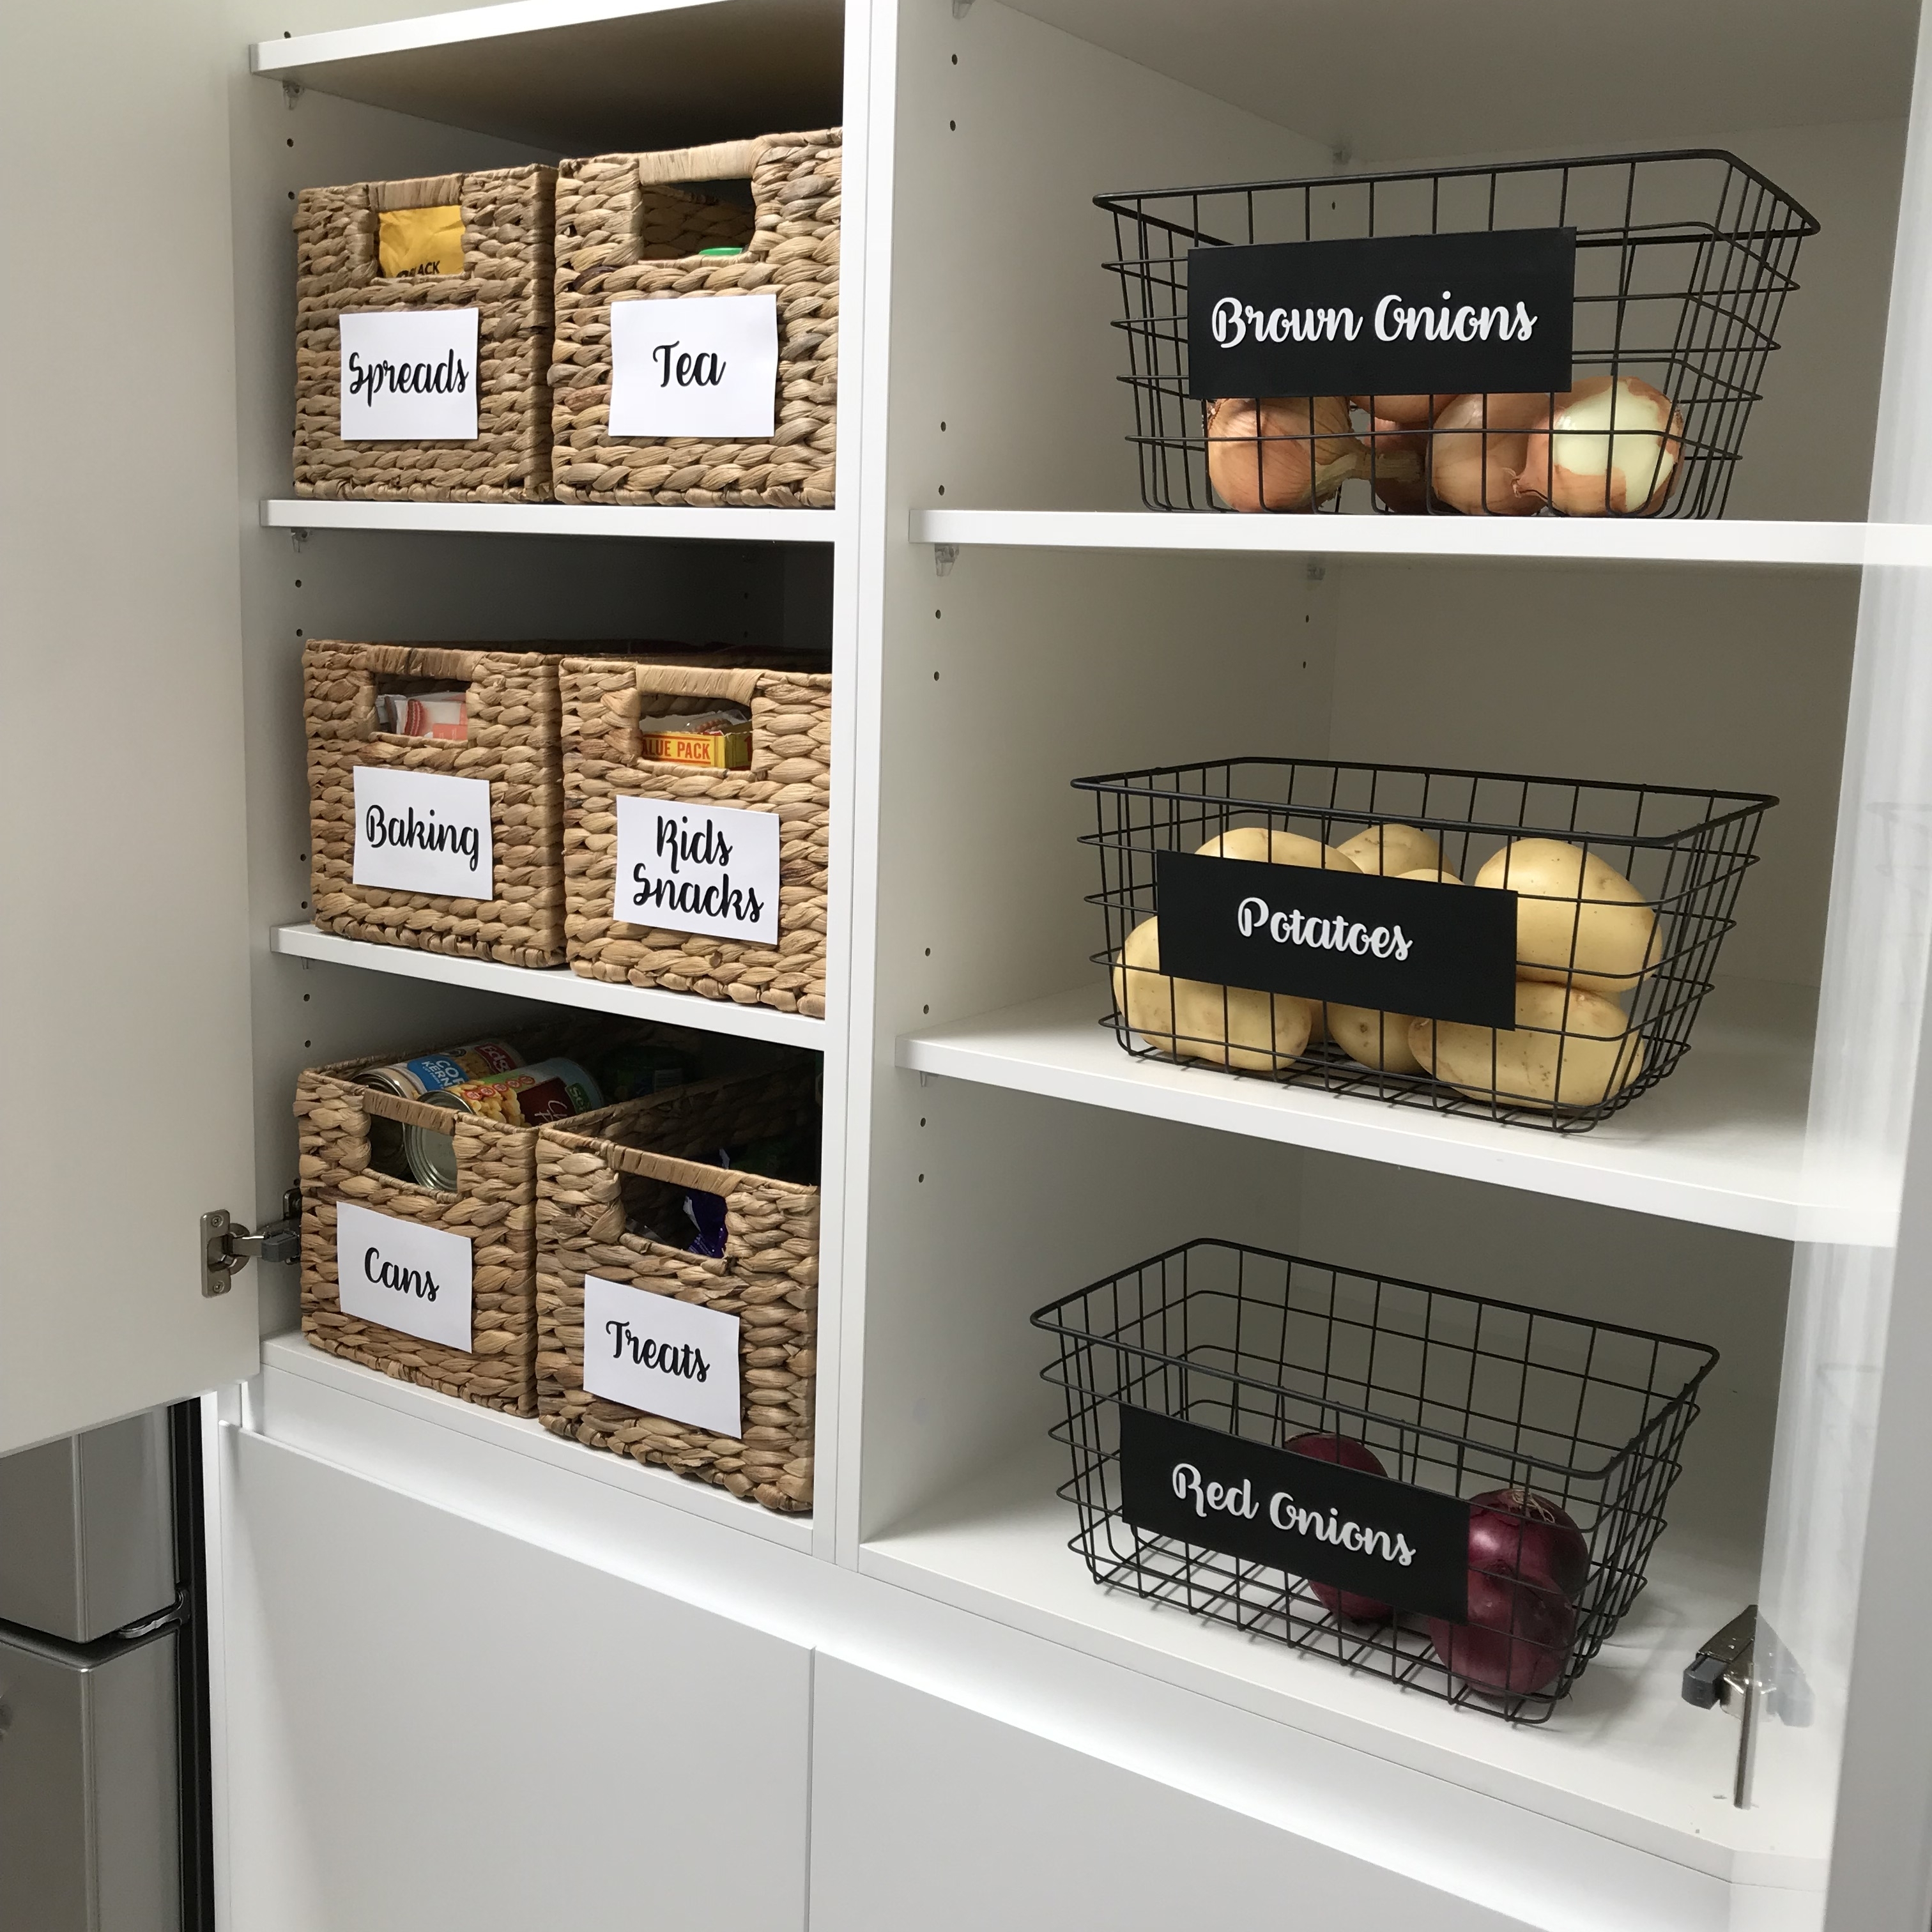
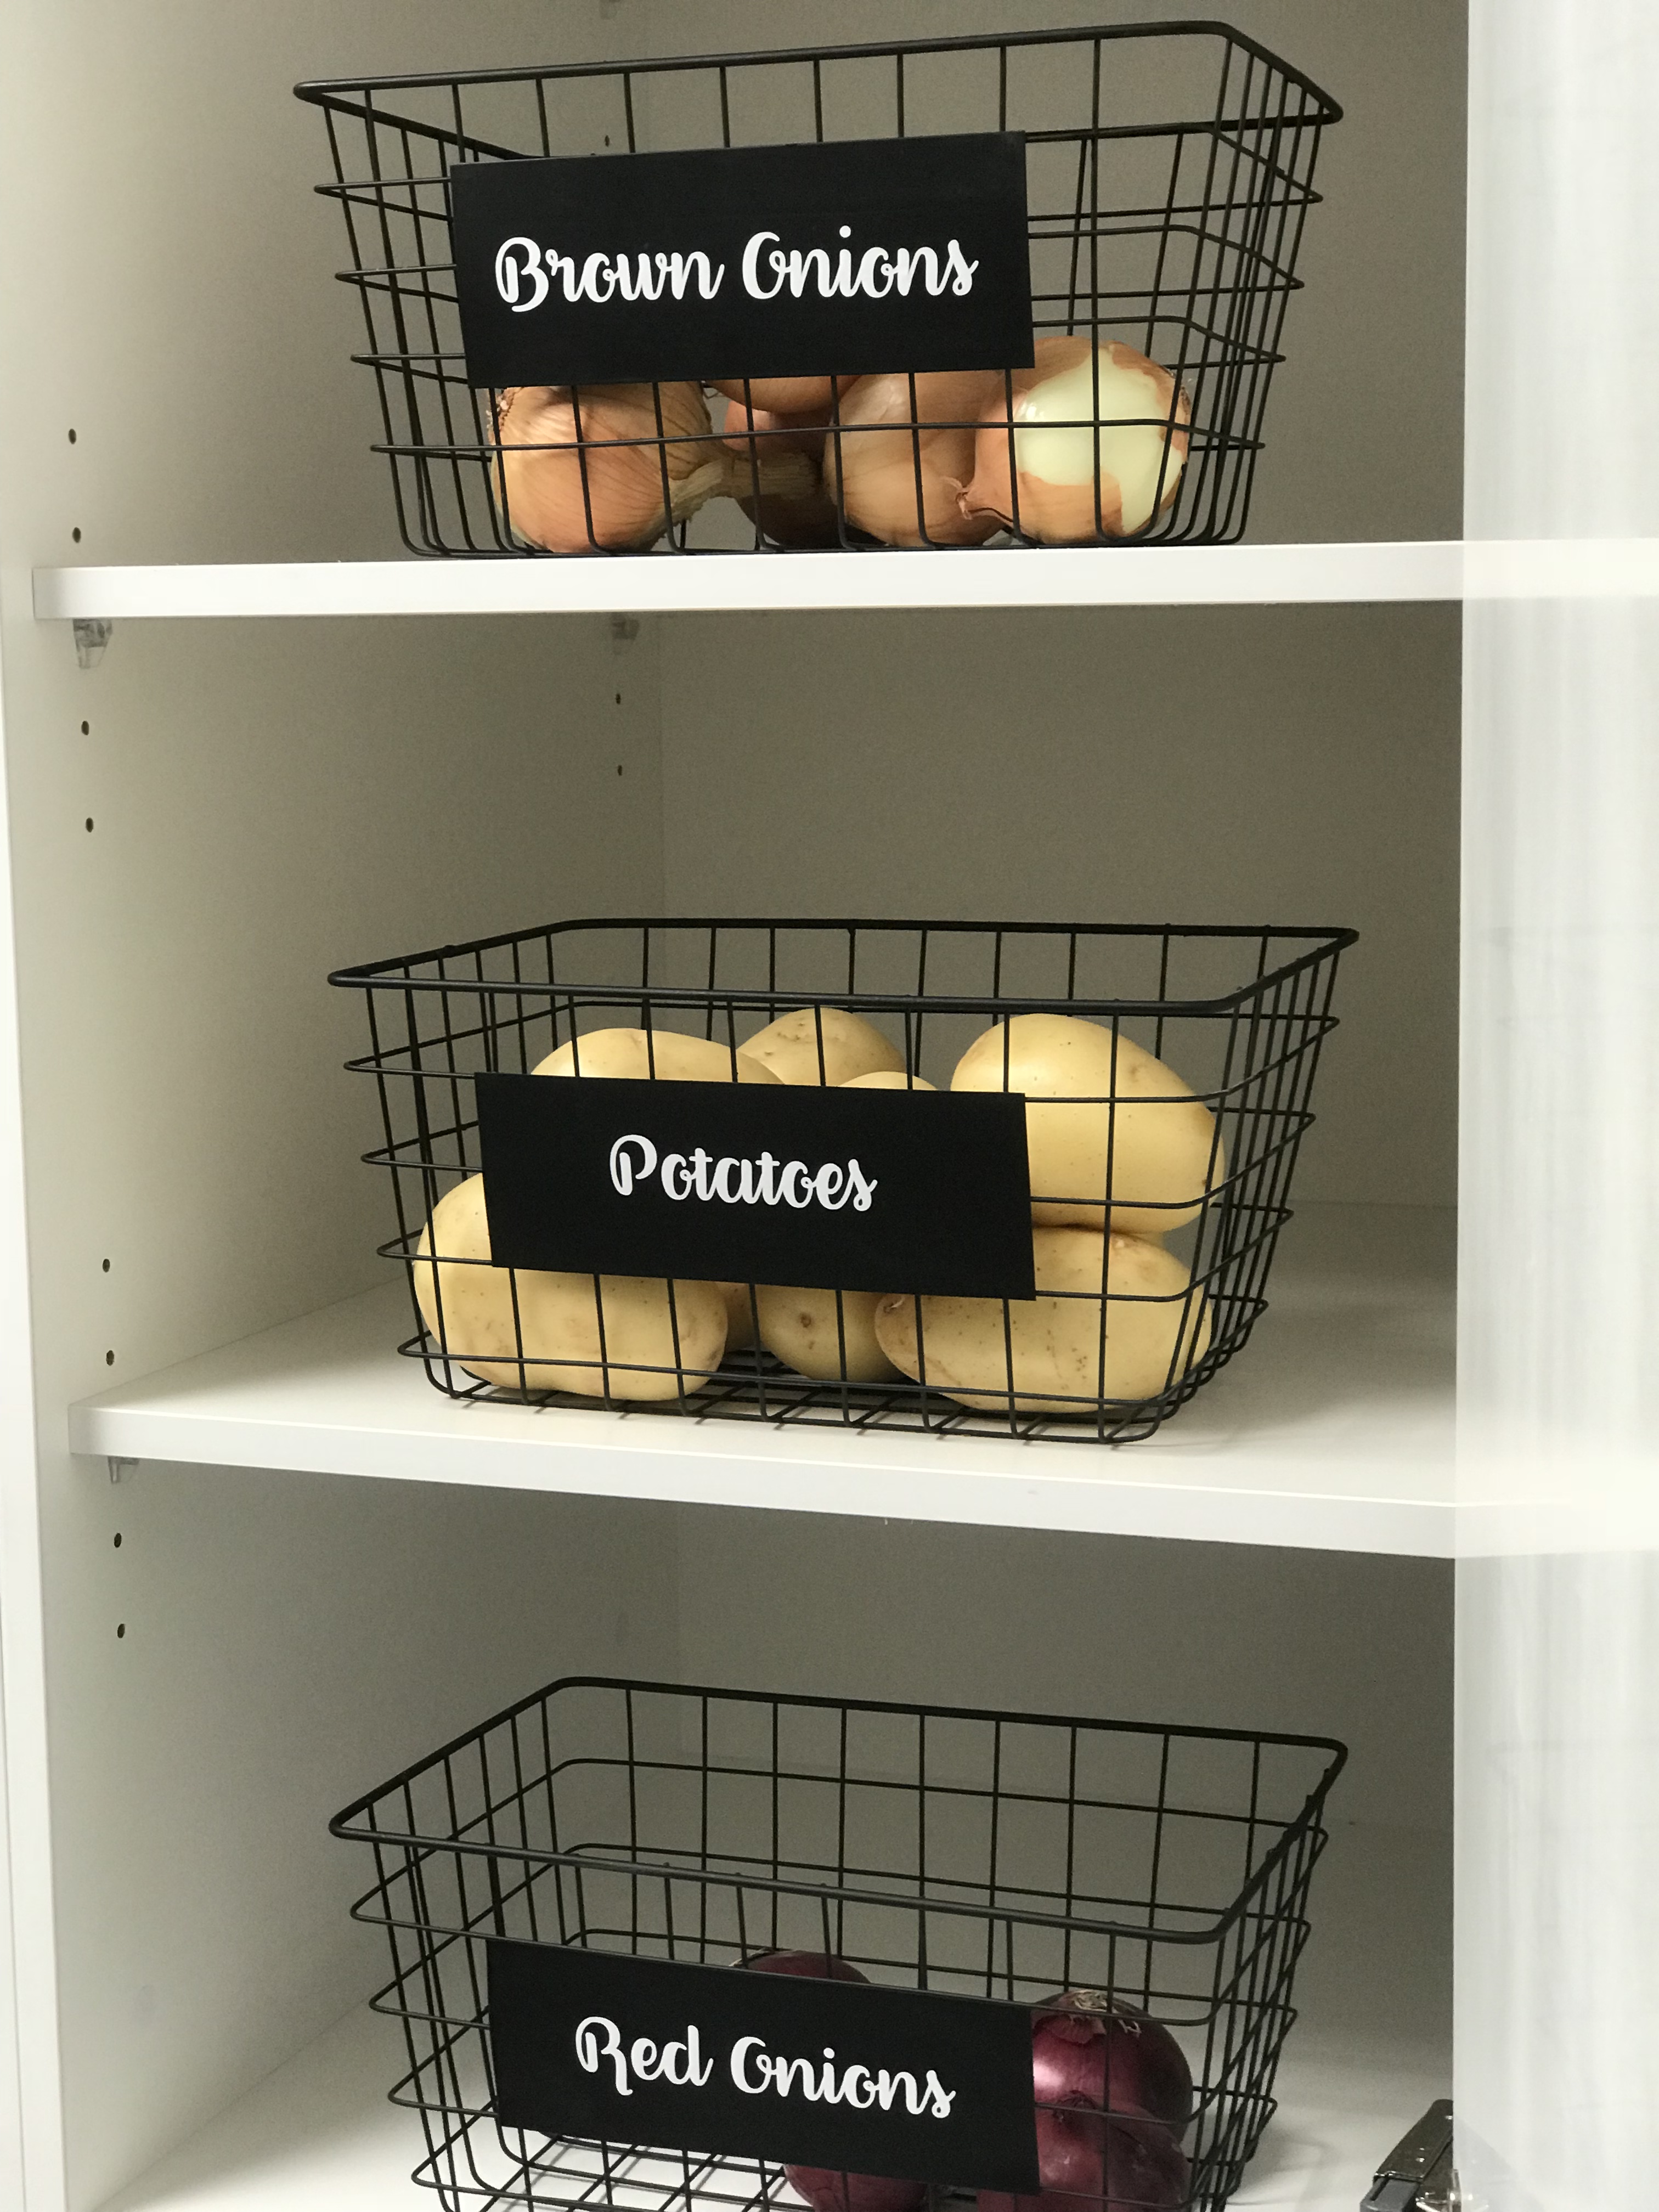
Once we labelled and filled the containers, we organised all her ‘like items.’ These are items that are going to be stored in larger containers including snacks, rice/pasta, cooking sachets/stock, baking goods, cans, condiments, etc. It’s totally up to you what goes in these storage containers. Maggy chose the rectangle baskets from Kmart which you can see fit perfectly in her pantry. Click here to shop the baskets.
I labelled these baskets with our newest product, our ‘storage tags.’ These tags are great to label larger containers/baskets that you won’t be able to adhere the vinyl label to. You have a choice of sticking these on or we will provide twine for you to tie it with. Shop our storage tags here. Storage containers/baskets/crates are also great to remove and carry to the kitchen bench to save you time going back and forth to the pantry.

When it comes to labelling, the better you do it the easier it is for you to access everything and you’re more likely to keep your pantry neat and organised.
When organising your canisters and storage containers, I tend to put the heavier items down the bottom and the canisters you will use everyday at eye level. I also like to group the canisters eg. Flour and sugar together, rice and pasta together.
My last tip for you is to get creative! Don’t use your pantry for food storage only. Arrange your plates and bowls in an organised way on the shelves of your pantry. We had some spare space to play with in Maggy’s pantry and used that space to display her wooden cake stand, some cookbooks and her bottled mineral water.

And finally, I’m trying to convince Maggy to remove her pantry doors, get rid of the hinges and display her crisp, perfectly organised pantry for all to enjoy!
So here’s a recap of my top tips…
1. Have a plan, work out your budget for the whole project and measure your space
2. Source your storage solutions accordingly, the right storage can make all the difference in pantry organisation
3. Organise ‘like items’ and packet food in labelled storage tubs
4. Label everything!
5. Get creative! Pantries aren’t only for storing food, add some décor or arrange your bowls and plates neatly
Do you want to have the pantry of your dreams but just don't have the time to do it or don't know where to start? We are here to help you! Click here to find out more about our physical or virtual home organisation services or contact hello@littlelabelco.com for a quote.
Leave a comment